
Table of Contents
- Planning and Preparing Your Metal Roof Installation
- Choosing Your Metal Panel Type and Profile
- Metal Roofing Underlayment and Moisture Control
- Metal Roof Installation Steps: From Layout to Fastening
- Metal Roof Flashing Details and Trim Installation
- Metal Roof Installation Time and Project Scheduling
- Quality Checks and Warranty Protection
- Frequently Asked Questions
Last Updated: October 18, 2026
Planning and Preparing Your Metal Roof Installation
Metal roof installation for new construction requires careful planning before the first panel goes up. Getting this phase right prevents costly mistakes later.
Roof Framing and Pitch Requirements
Your roof framing must support the weight and wind resistance of metal panels. Most metal roofing systems work best on pitches of 3:12 or steeper. Anything flatter requires additional underlayment and sealing details to prevent water pooling.
Check your roof framing for these key points:
- Rafter spacing (typically 16 or 24 inches on center)
- Adequate bracing to handle wind uplift forces
- Proper slope to shed water away from valleys and penetrations
- Structural capacity for snow loads in your region
The roof deck itself must be solid and secure. Loose or damaged framing creates problems that no panel installation can fix. Inspect the entire structure before ordering materials.
Building Codes and Permit Requirements
Building codes govern how metal roofs must be installed. Local authorities having jurisdiction (AHJs) enforce these rules. You’ll need permits before work begins, and inspections at key stages.
Common code requirements include:
- Wind resistance ratings (often 90+ mph in exposed areas)
- Fire ratings and flame spread classifications
- Snow load capacity appropriate to your region
- Proper flashing and drainage design
- Underlayment specifications for condensation control
Contact your local building department early. They’ll tell you exactly what inspections you need and when. Getting permits upfront saves delays and protects your investment.
Choosing Your Metal Panel Type and Profile
The panel you choose affects installation method, cost, appearance, and long-term performance. Two main categories dominate the market: standing seam and exposed fastener panels.
Standing Seam vs. Exposed Fastener Panels
Standing seam panels have a raised vertical seam where adjacent panels lock together. Fasteners are hidden inside the seam, protected from weather.
Standing seam advantages:
- Fasteners stay protected from wind, sun, and corrosion
- Better water shedding due to raised seams
- Premium appearance for visible roofs
- Easier to maintain (no fastener degradation)
Exposed fastener panels (also called five-rib or similar profiles) have fasteners visible on the panel face. These screws hold panels directly to the roof deck.
Exposed fastener advantages:
- Lower material cost
- Faster installation (fewer steps)
- Good performance on steep pitches
- Suitable for industrial and agricultural buildings
The trade-off is clear: standing seam costs more but lasts longer with fewer maintenance issues.
Material Selection: Steel Coating and Durability
Metal roofing panels are typically made from galvanized steel or aluminum. Steel is stronger and more affordable. Aluminum resists corrosion better but costs more.
The coating matters as much as the base metal. Common coatings include:
- G90 galvanized: Standard zinc coating, good for most climates
- SMP (Silicone Modified Polyester): Mid-range durability, 20-year warranty typical
- PVDF (Polyvinylidene Fluoride): Premium coating, 30+ year warranty, best for harsh climates
In cold climates with freeze-thaw cycles, heavier coatings protect against corrosion. The coating prevents rust that shortens panel life. For installations in regions with extreme seasonal temperature swings, SMP or PVDF finishes are often recommended.
Metal Roofing Underlayment and Moisture Control
Underlayment sits between the metal panels and the roof deck. It serves two critical functions: it stops water that gets past the panels, and it prevents condensation buildup inside the roof assembly.
Solid Sheathing versus Open Framing
Solid sheathing uses plywood or OSB across the entire roof deck. Metal panels then fasten to this solid surface.
Solid sheathing benefits:
- Uniform fastener holding power
- Better support for panel seams
- Easier to locate fastener positions
- Provides a base for underlayment
Open framing (purlins or struts) leaves gaps between framing members. Metal panels span across these gaps. This approach reduces material cost but requires stiffer panels and careful spacing.
Open framing works when:
- Panels are stiff enough to span the distance
- Wind loads are moderate
- Budget is the primary concern
Solid sheathing is standard for new construction because it provides consistent support and simplifies installation.
Ventilation and Condensation Prevention
Metal panels conduct temperature swings rapidly. On cold mornings, warm interior air hits the cold panel underside and condenses. This moisture can damage insulation and framing.
Prevent condensation with proper ventilation:
- Install an air gap between insulation and the metal panel
- Use ridge vents to allow warm air to escape
- Install soffit vents to draw in cool air
- Ensure the air path is unobstructed
Ice and water shield under the underlayment adds extra protection at valleys and edges. This prevents water that gets past the panels from entering the building.
Metal Roof Installation Steps: From Layout to Fastening
The installation sequence matters. Rushing or skipping steps leads to leaks and warranty issues.
Panel Layout and Alignment
Start by measuring the roof width carefully. Your first panel sets the tone for the entire installation. If it’s crooked, every panel after it will be off.
Layout steps:
- Measure from one end of the roof to the other
- Calculate panel widths to find how many panels you need
- Plan for overlap (typically 1.5 inches for exposed fastener panels)
- Mark the centerline of the roof for reference
- Snap chalk lines to guide panel placement
Alignment matters for appearance and water shedding. Panels that aren’t parallel to the ridge look sloppy and may not shed water correctly. Take time to get the first row perfect.
Installing and Fastening Metal Panels
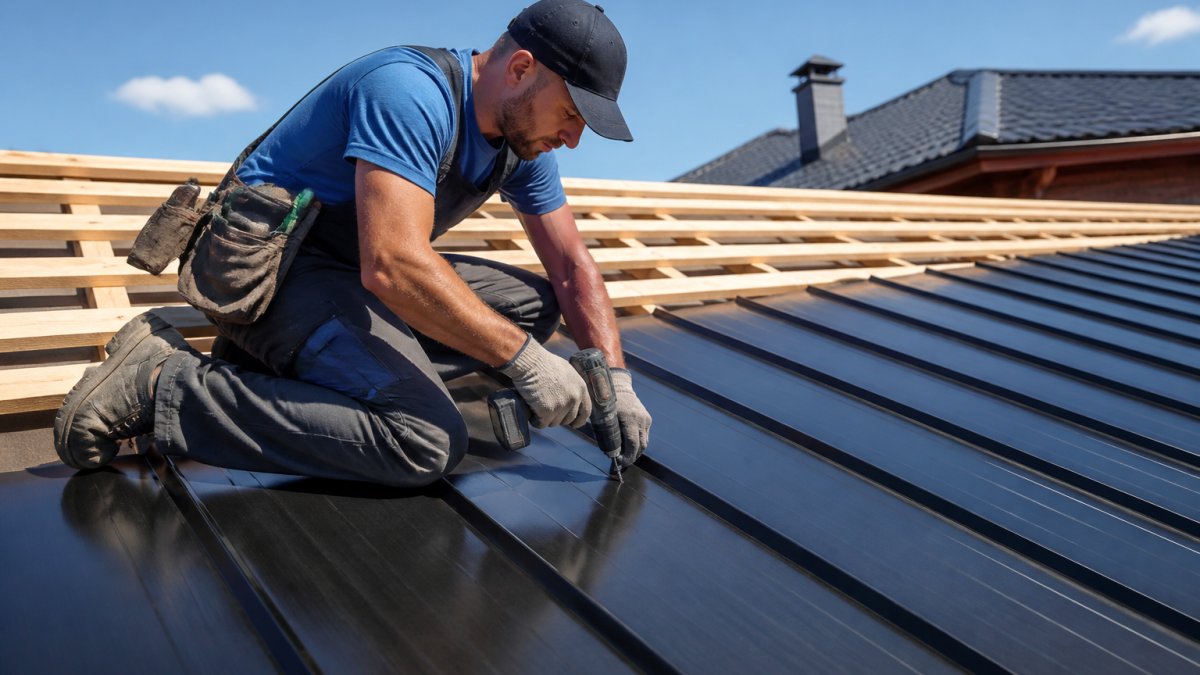
Fastening is where most installation problems start. Too few fasteners and wind can lift panels.
Fastening guidelines:
- Use the fastener spacing specified by the panel manufacturer
- Install fasteners in the flat areas of the panel, not the ribs
- Use fasteners rated for metal roofing (stainless steel or coated steel)
- Tighten fasteners snugly but not so tight they compress the panel
- Check fastener alignment as you go
Each fastener creates a potential leak point. Use sealant under fastener heads to prevent water from entering around the screw.
Panel overlap is critical. Panels must overlap enough to shed water but not so much that fasteners hit underlying panels. Follow the manufacturer’s specifications exactly.
Common Installation Mistakes to Avoid
These mistakes can cause problems:
Misaligned first panel: The entire roof follows the first panel. If it’s crooked, the whole installation looks bad and may not shed water properly.
Fastener spacing errors: Too few fasteners and panels lift in wind. Too many fasteners create unnecessary leak points.
Inadequate overlap: Panels that don’t overlap enough allow water to run into the seams.
Ignoring manufacturer specs: Each panel type has specific installation requirements. Skipping these steps voids warranties and creates performance problems.
Rushing the job: Metal roof installation takes time.
Metal Roof Flashing Details and Trim Installation
Flashing is the metal trim that directs water away from vulnerable areas. Poor flashing causes most metal roof leaks.
Ridge Cap, Eave Trim, and Rake Trim
Ridge cap seals the peak where two roof slopes meet. Water runs down the panels and toward the ridge.
Ridge cap installation:
- Install cap material that matches the panel profile
- Overlap pieces by at least 6 inches
- Seal overlaps with sealant rated for metal roofing
- Fasten according to manufacturer specs
Eave trim (also called drip edge) runs along the lower edge of the roof.
Rake trim runs along the sloped edges of the roof.
Both trim pieces must be properly sealed and fastened. Gaps here allow water to enter the building envelope.
Valley Flashing and Penetration Sealing
Valleys are where two roof slopes meet at an inside corner. Water concentrates here and needs a clear path to the gutter.
Valley flashing options:
- Closed valleys (panels overlap the valley)
- Open valleys (metal flashing visible)
- Woven valleys (panels weave together)
Each method has trade-offs between appearance and water shedding. Closed valleys look better but require careful panel layout. Open valleys are more reliable but show the flashing.
Penetrations include vents, skylights, and chimneys. Each one requires custom flashing to prevent leaks.
Penetration sealing steps:
- Install flashing that extends under the upper panels and over the lower panels
- Seal all joints with sealant rated for metal roofing
- Test the installation by running water to verify it sheds properly
- Inspect regularly during the first year for any seepage
Metal Roof Installation Time and Project Scheduling
Installation timeline depends on roof size, complexity, weather, and crew experience. Planning the schedule prevents delays and cost overruns.
Timeline Factors and Weather Considerations
A typical residential metal roof installation can take several days. Commercial roofs take longer depending on size and complexity.
Factors that affect timeline:
- Roof area (larger roofs take longer)
- Number of penetrations and valleys
- Complexity of flashing details
- Weather conditions
- Crew size and experience
Weather is critical. Rain stops work immediately because wet panels are slippery and fasteners won’t hold properly.
Plan installations during dry seasons when possible. Spring and fall typically offer the best weather for roofing work.
Cold Climate Installation and Winter Performance
Cold climates present unique challenges. Freeze-thaw cycles stress fasteners and seams. Proper installation techniques prevent these problems.
Cold climate considerations:
- Use fasteners with neoprene washers that stay flexible in cold
- Apply sealants rated for low-temperature application
- Ensure proper ventilation to prevent condensation
- Install adequate insulation to prevent ice dams
- Plan for thermal expansion and contraction
Metal expands and contracts with temperature swings. Installation must allow for this movement without stressing fasteners or seams.
Quality Checks and Warranty Protection
A final inspection before handoff protects your investment. Walk the roof with the installer and verify that everything meets specifications.
Inspection Points and Performance Verification
Check these items before accepting the installation:
- Panel alignment and straightness
- Fastener spacing and tightness
- Flashing seal integrity (no gaps or cracks)
- Overlap consistency across all panels
- Ridge and eave trim security
- Penetration flashing detail
- Sealant application quality
- No debris or damage to panels
Run water tests on valleys and around penetrations. Water should shed cleanly without pooling. Any water that enters seams indicates a problem.
| Inspection Item | What to Check | Expected Result |
|---|---|---|
| Panel Alignment | Straight lines parallel to ridge | No visible waviness or misalignment |
| Fastener Spacing | Consistent spacing per specs | Even rows with no gaps |
| Flashing Seals | Sealant around all flashing | Continuous bead with no voids |
| Panel Overlap | Consistent lap distance | Uniform overlap across roof |
| Penetrations | Flashing around vents and pipes | Water sheds away cleanly |
Document the inspection with photos. Keep these records for warranty claims if issues arise later.
Metal roof installation for new construction is a significant investment in your building’s durability and protection. Iron Shield Roofing offers expert installation services to ensure your new metal roof performs for years to come.
Frequently Asked Questions
How long does metal roof installation take on a new construction project?
Metal roof installation time depends on roof size, panel type, and weather conditions. Installation times vary for residential or small commercial buildings, and larger facilities or complex designs may require more time. Cold weather or high winds can extend timelines. Coordinating with other trades during new construction and ensuring sheathing and framing are complete beforehand helps keep the project on schedule.
What underlayment should I use under a metal roof?
Metal roofing underlayment protects against moisture and condensation. Ice and water shield is essential at eaves and valleys for leak prevention. For the field of the roof, synthetic underlayment or felt is common, though ventilation systems can reduce underlayment requirements. On solid sheathing, underlayment is critical to prevent condensation buildup. On open framing with ventilation, underlayment acts as a secondary weather barrier. Choose underlayment based on your roof assembly design, climate exposure, and local building codes.
What flashing details prevent leaks around metal roof edges and penetrations?
Proper flashing details are critical to metal roof performance. Ridge cap flashing seals the peak, while eave trim and drip edge direct water away from fascia. Rake trim protects gable ends. Valley flashing channels water safely where two roof slopes meet. Around chimneys, vents, and other penetrations, use manufacturer-specific flashing kits sealed with compatible sealants. Ensure all flashing overlaps panels correctly and fasteners are sealed. Poor flashing installation is a leading cause of metal roof leaks, so attention to detail during this phase prevents costly repairs.
Can metal roofing be installed during cold weather in new construction?
Metal roofing can be installed in cold weather, but conditions matter. Avoid installation during heavy snow, ice, or extreme wind. Sealants and fasteners perform best when applied in appropriate temperatures. In freezing conditions, sealant cure times can lengthen, and worker safety can be challenging. New construction projects with tight timelines should coordinate metal roof installation during milder seasons when possible. If cold-weather installation is unavoidable, use cold-weather sealants and allow extra time for curing. Your roofing contractor can advise on weather-specific adjustments to ensure quality installation.